
Dr Delicious
LATEST RECIPES
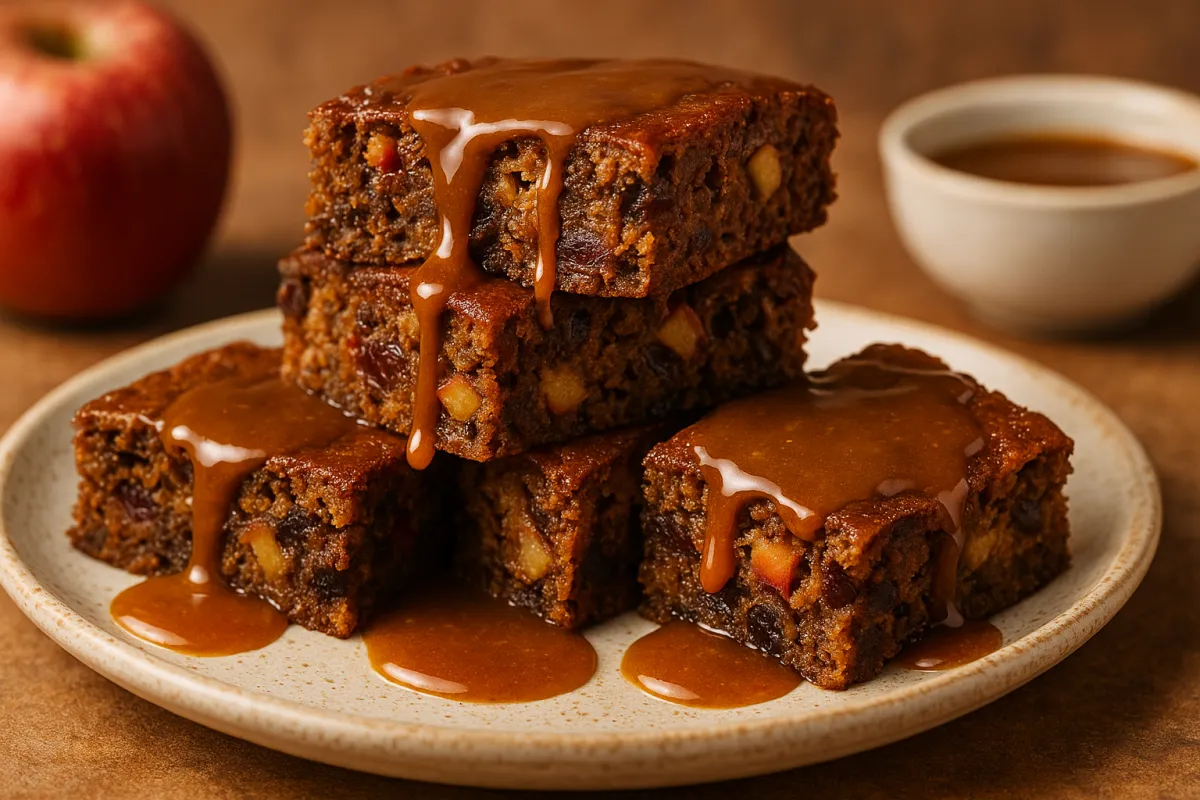
Sticky Toffee Apple & Date Bars
🍎 Sticky Toffee Apple & Date Bars
Soft, gooey, and packed with cozy fall flavor!
There’s something magical about the smell of baked apples and caramel in the air. These Sticky Toffee Apple & Date Bars taste like autumn wrapped in a dessert — a mix of soft apples, sweet dates, brown sugar, and buttery toffee. Think sticky toffee pudding meets apple crumble, all in an easy-to-make snack bar.
Perfect for chilly days, lunchbox treats, or cozy evenings with a cup of tea 🍂☕

🍏 Why You’ll Love These Bars
Super soft, chewy, and naturally sweetened with apples & dates
Easy to make — no mixer needed
Freezer-friendly and travel well
Smell like a cozy autumn hug
🧺 Ingredients (Makes 12 Bars)
For the base:
1 cup (130g) plain flour
1 tsp baking powder
½ tsp cinnamon
¼ tsp salt
½ cup (100g) brown sugar
½ cup (115g) butter, melted
1 egg
1 tsp vanilla extract
For the filling:
1 ½ cups (200g) chopped apples (peeled if you like)
½ cup (80g) pitted dates, chopped
2 tbsp brown sugar
1 tbsp butter
¼ cup (60ml) water
For the toffee drizzle (optional but sooo worth it):
¼ cup (60ml) double cream or heavy cream
2 tbsp butter
2 tbsp brown sugar
Step-by-Step: Sticky Toffee Apple & Date Bars
Before you start (3 minutes)
Pan: 8×8 in (20×20 cm) square tin
Line it: Grease lightly, then line with baking paper so it overhangs (easy lift-out).
Oven: Preheat to 180°C / 350°F (160°C fan).
Tools: 2 small saucepans, 1 big bowl, wooden spoon, rubber spatula, knife, chopping board, measuring cups/spoons.
Safety: Grown-up handles oven + hot pans.

1) Make the apple–date filling (8–10 minutes)
You’ll need:
1½ cups (200 g) apples, chopped small (about pea–marble size)
½ cup (80 g) pitted dates, chopped
2 tbsp (25 g) brown sugar
1 tbsp (15 g) butter
¼ cup (60 ml) water
How to:
Put butter, apples, dates, sugar, water into a small pan.
Turn heat to medium-low. Stir every 30–45 seconds for 5–7 minutes.
Visual cues: Apples look soft and shiny, dates look melty/jammy, liquid looks syrupy, not watery.
Turn heat off. Scrape into a bowl and let it cool 5 minutes.
Tip: If dates are very dry, soak them in hot water 5 minutes first, drain, then use.

2) Mix the base batter (5 minutes)
You’ll need:
½ cup (115 g) melted butter (cool-warm, not hot)
½ cup (100 g) brown sugar
1 large egg
1 tsp vanilla
1 cup (130 g) plain/all-purpose flour
1 tsp baking powder
½ tsp ground cinnamon
¼ tsp fine salt
How to:
In a large bowl, stir melted butter + brown sugar until it looks caramelly and smooth (20–30 sec).
Add egg + vanilla; stir until glossy (another 20–30 sec).
Sprinkle in flour, baking powder, cinnamon, salt.
Stir just until no dry flour is visible (about 20–25 stirs). Batter will be thick.
Fold in the cooled apple–date filling with a spatula (2–3 gentle folds). Don’t overmix.
Visual cues: Batter looks golden, thick, speckled with apples + dates.

3) Pan it and level (1 minute)
Scrape batter into the lined tin.
Wet the spatula with water and smooth the top so it’s level (prevents doming).

4) Bake (25–30 minutes)
Place tin on the middle rack.
Bake 25–30 min (start checking at 24).
Doneness cues:
Top: evenly golden with tiny cracks.
Centre: set, not jiggly.
Toothpick test: Comes out with a few moist crumbs, not wet batter.
If edges brown too fast, tent loosely with foil for the last 5 minutes.
Common mistake: Overbaking = dry bars. Pull them when just set.

5) Cool (very important for clean slices) (30–40 minutes hands-off)
Put the tin on a wire rack. Cool 15 minutes in the tin.
Lift out using the paper and cool another 15–25 minutes until just warm.
For super neat bars, chill 15–20 min in the fridge before slicing.

6) Make the toffee drizzle (optional but amazing) (3–4 minutes)
You’ll need:
2 tbsp (28 g) butter
2 tbsp (25 g) brown sugar
¼ cup (60 ml) double/heavy cream
Stovetop method:
In a small pan, add butter + sugar + cream.
Heat on medium-low, stirring, until smooth and bubbling gently (1–2 min).
Simmer 30–60 sec more until slightly thicker.
Off heat. It thickens more as it cools.
Microwave method:
Add all to a microwave-safe jug. Heat 30 sec, stir; heat 15-sec bursts, stirring, until smooth and slightly thick.

7) Slice & serve (2 minutes)
Use a long sharp knife. Wipe blade between cuts.
Slice into 12 bars (3×4 grid) or 16 squares.
Drizzle with warm toffee. Optional: a pinch of flaky salt on top.
Texture goals: Top is shiny/soft, centre is chewy-gooey, edges lightly golden.

Storage & reheating
Room temp: Airtight up to 4 days.
Freeze: Up to 3 months (wrap individually). Thaw at room temp.
Rewarm: 10–15 sec in microwave for that fresh-baked softness.
Quick Troubleshooting
Crumbly/dry: Overbaked; next time pull at moist-crumb stage.
Soggy middle: Underbaked; add 3–5 more minutes.
Bars sink: Batter overmixed or oven too cool; verify temp, fold gently.
Toffee grainy: Heated too hot/fast; re-melt on low, stir until glossy.
Easy swaps (if you need them)
Dairy-free: Use vegan butter; coconut cream for drizzle.
Gluten-free: Swap flour for a 1:1 GF blend; check baking powder is GF.
Nutty version: Fold in ½ cup (60 g) chopped pecans or walnuts with the filling.
🍴 Recommended Tools for Making Sticky Toffee Apple & Date Bars
1. Nonstick 8×8-Inch Baking Pan
➡️ Example: USA Pan 8-Inch Square Cake Pan on Amazon
A sturdy, nonstick pan is perfect for chewy dessert bars like these — they bake evenly and release easily. I love ones with square corners for neat slices!
2. Parchment Paper Sheets (Pre-Cut)
➡️ Example: Kitchens Parchment Paper Sheets
Skip the struggle of tearing and folding! Pre-cut parchment fits right in your pan, saves cleanup, and lifts the bars out perfectly.
3. Heavy-Duty Saucepan (for toffee & filling)
➡️ Example: Cuisinart Stainless Steel Saucepan
A small, heavy-bottomed saucepan helps melt butter and sugar gently without burning your toffee or fruit filling.
4. Silicone Spatula Set
➡️ Example: Silicone Spatula Set
Great for scraping every bit of batter (and toffee!) from your bowl — flexible, heat-safe, and easy to clean.
5. Mixing Bowl Set (Nested Sizes)
➡️ Example: Glass Mixing Bowl Set
You’ll need a few bowls for this recipe — one for wet, one for dry, and one for apples. Glass or stainless steel bowls make cleanup simple.
6. Wooden Spoon or Silicone Spoonula
➡️ Example: wooden spoon set
Perfect for stirring warm fillings and gently folding your batter without overmixing.
7. Small Heatproof Jug (for Toffee Sauce)
➡️ Example: Pyrex 2-Cup Measuring Jug
Ideal for melting butter and sugar in the microwave or pouring warm sauce over your bars.
8. Apple Peeler & Corer
➡️ Example: OXO Good Grips Apple Corer and Peeler
Makes prepping apples so much quicker — especially if you’re baking in bulk or with kids.
9. Digital Kitchen Scale
➡️ Example: Food Kitchen Scale
For perfect texture, accuracy matters! A kitchen scale helps you measure flour and sugar precisely (no guesswork).
10. Wire Cooling Rack
➡️ Example: Checkered Chef Cooling Rack
Cooling your bars evenly is key to keeping that soft, chewy texture. A good rack prevents soggy bottoms.

Hi I'm Dr Delicious
Welcome to The Plant-Based School — your go-to place for simple, delicious, and nourishing recipes. We make healthy eating effortless, so you can enjoy wholesome meals every day.
Readers Favorite Recipe Ebook

Subscribe to our free Newsletter
Make it easy to eat healthy!